
Parchment Craft issue 2014

A pretty winter lace design for Christmas, simply change the greeting for a winter birthday card.

You will need:
Parchment craft paper
White Pencil
Graphite Pencil & Eraser
Mapping Pen & White ink
Embossing & Perforating Mats
Pergamano Grid Number 24 & 19
Pergamano 2mm Star Tool
PCA Fine Semi Circle Tool
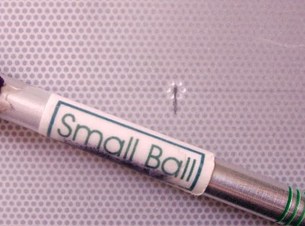
PCA Micro, Small Ball Tools
PCA Scriber Tool
PCA Fine Large Semi Circle Tool
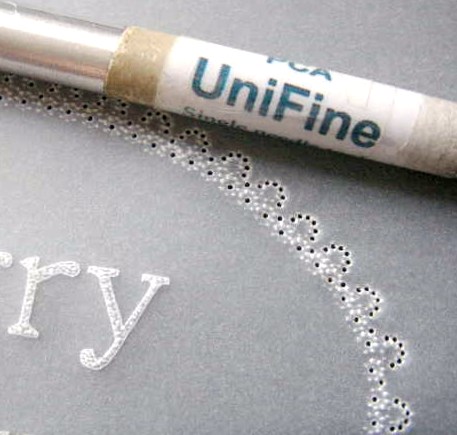
PCA Uni Fine Tool
PCA Uni Bold Tool
Parchment Craft Scissors
Parchment craft paper
White Pencil
Graphite Pencil & Eraser
Mapping Pen & White ink
Embossing & Perforating Mats
Pergamano Grid Number 24 & 19
Pergamano 2mm Star Tool
PCA Fine Semi Circle Tool
PCA Micro, Small Ball Tools
PCA Scriber Tool
PCA Fine Large Semi Circle Tool
PCA Uni Fine Tool
PCA Uni Bold Tool
Parchment Craft Scissors
Instructions: Main Design
Step 1
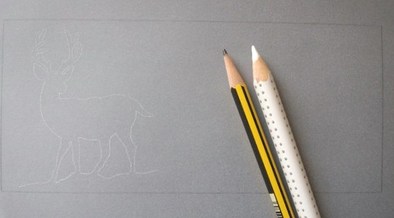
Tracing - Outline border and mark centres – Graphite pencil & Ruler
Reindeer – White Pencil
Reindeer – White Pencil
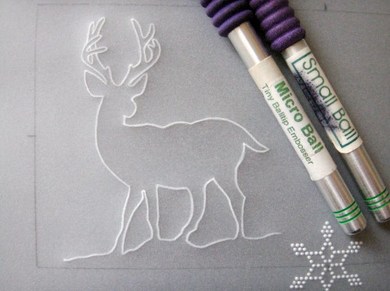
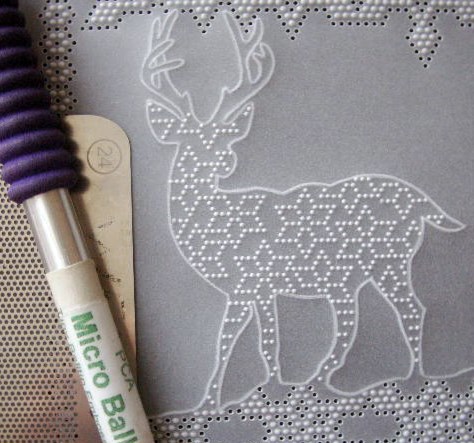
Step 2 - Line Emboss
Emboss - Reindeer – PCA Small & Micro Ball
Emboss over the lines of the reindeer using the small ball softly.
Re-emboss over the same lines using a micro ball to crisp up the whiteness.
Emboss over the lines of the reindeer using the small ball softly.
Re-emboss over the same lines using a micro ball to crisp up the whiteness.
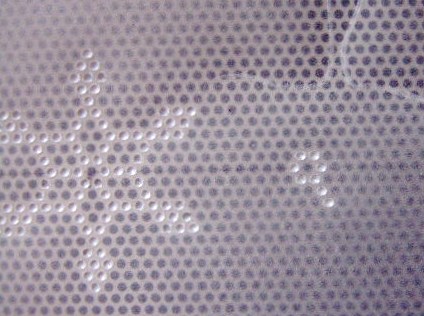
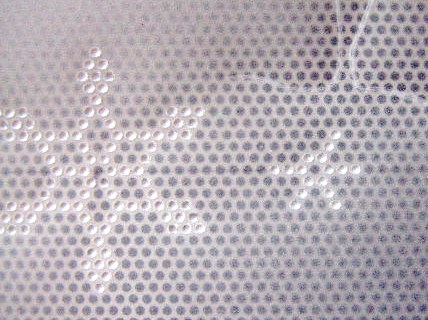
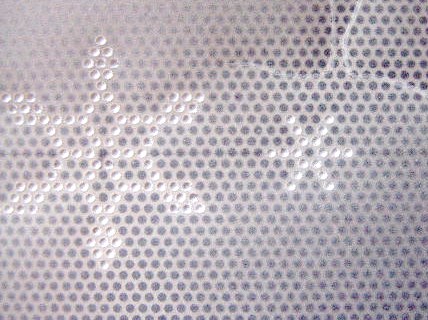
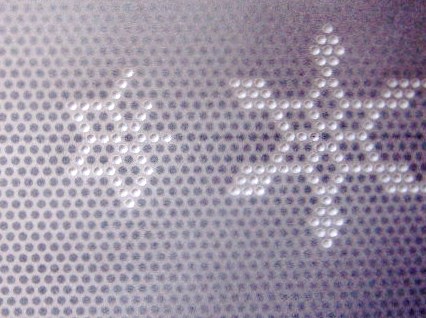
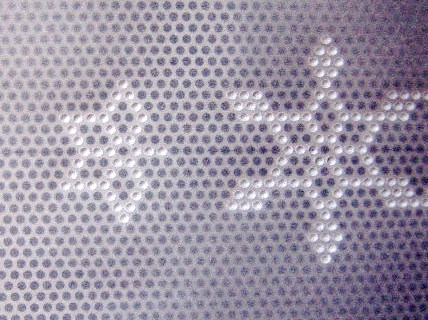
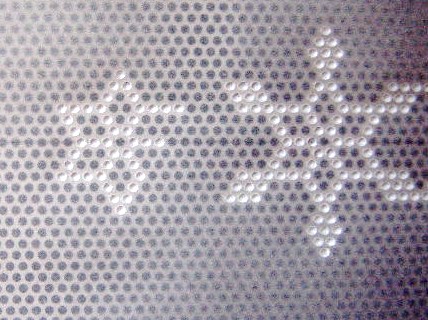
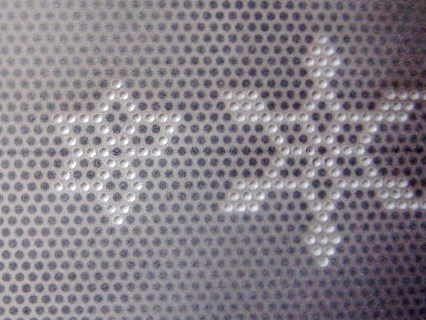
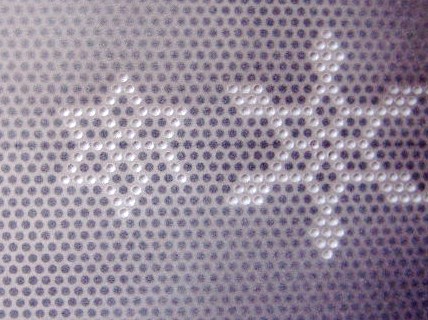
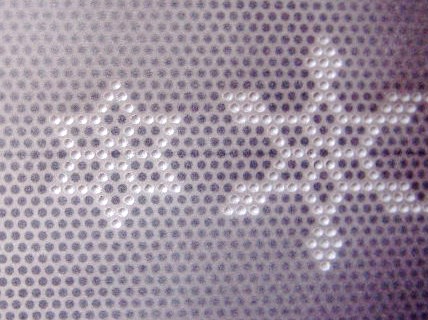
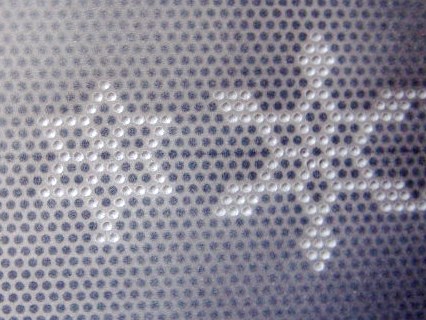
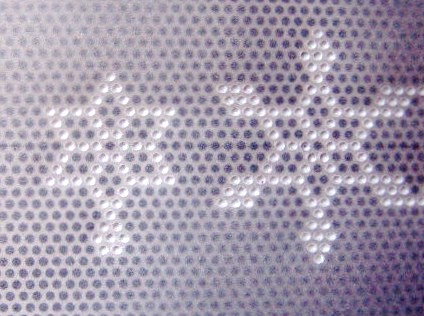
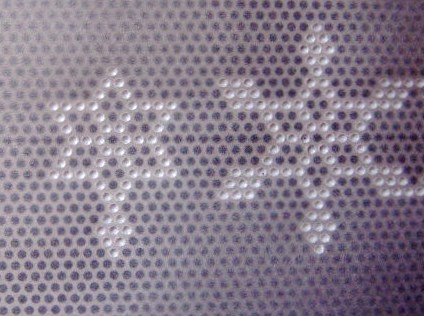
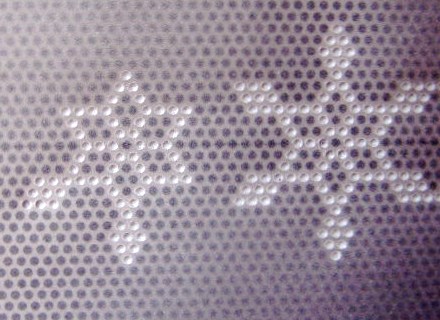
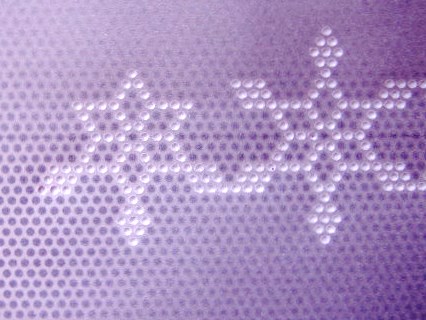
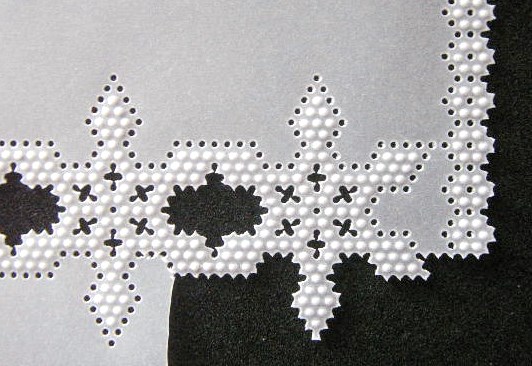
Step 3 - Grid Border Zen Lace 'Snowflakz' from my Parchment Craft Zen Lace CD's
Grid Embossing - Snowflakz Border Pattern
Secure your parchment right side down on a Pergamano Grid 19
Aligning border pencil lines a row of holes on grid.
The centre marks top & bottom are the start points for the ‘Snowflakz’ pattern
This pattern is repeated along the top & bottom borders.
Emboss the pattern using a PCA Small Ball Tool.
Emboss the left & right borders starting from the centres marks.
Remove from grid.
Practice building a Snowflake following the steps below.
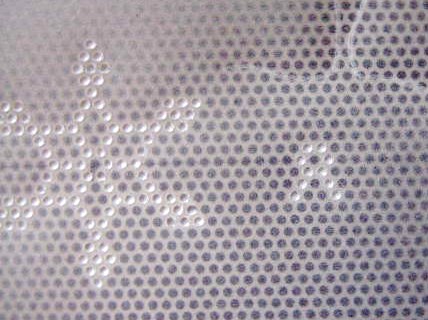
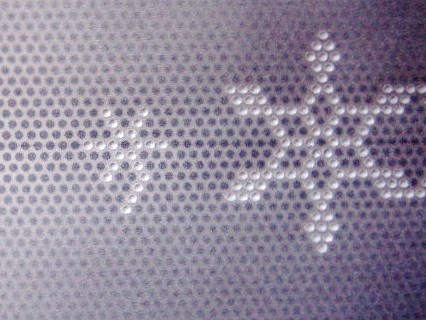
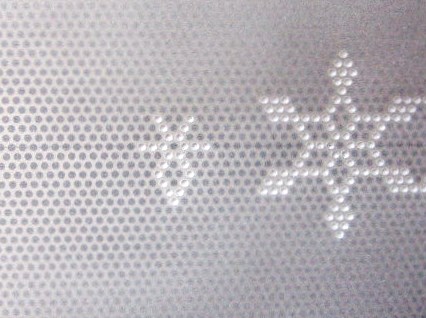
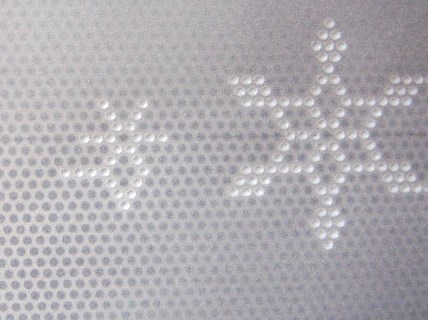
Build a Snowflakz Border Step by Step- 27 pictures

Step 1: Build a Snowflakz Border 'Step by Step Tutorial' Pergamano Grid 19 (Diagonal) and PCA Small Ball Tool or similar. 1st: Emboss the 6 dot flower shape as shown above, this is the centre of the snowflake.
Step 2 Emboss 2 dots from one of the 6 dot shape as shown
Step 3: Continue to emboss 2 dots moving outward from the centre flower shape
Step 4: Another 2 dots moving around the outside edge of the flower shape
Step 5: Embossed dots halfway around
Step 6: Almost completed this part of the snowflake
Step 7: The picture above shows 2 embossed dots connected to the centre flower shape dots
Step 8: Emboss 3 dots on the end of dots made in previous steps
Step 9: Emboss another 2 dots to connect as shown, you now have a diamond with 4 holes in the centre
Step 10: Emboss 3 more dots as shown
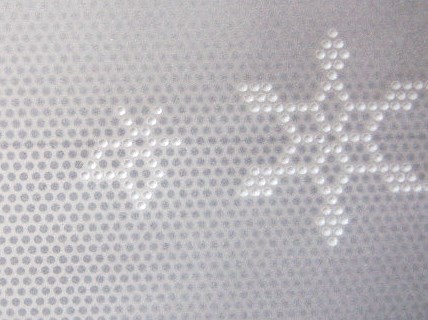
Step 11: Emboss 2 dots to complete another diamond to show 4 holes in the centre of the diamond.
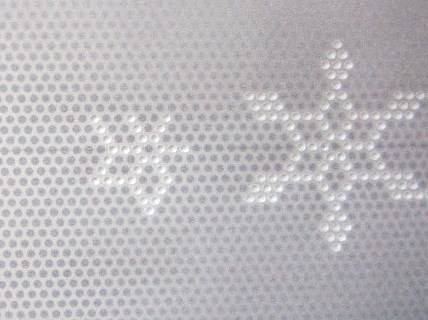
Step 12: Emboss 3 dots
Step 13: Emboss 2 dots to complete another diamond
Step 14: Guess what comes next?
Step 15: Emboss to complete the diamond as shown
Step 16: continue embossing to make another diamond
Step 17: The 5th diamond completed only one more to go.
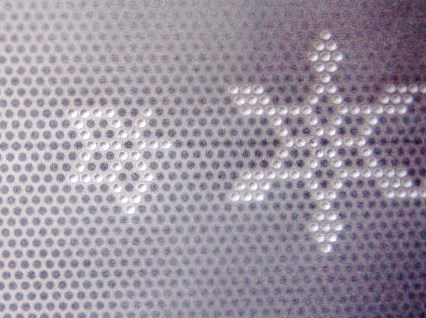
Step 18: Emboss 3 dots
Step 19: This pretty star shape create the main body of the snowflake and a pretty pattern in its own right.
Step 20: Emboss 2 dots across the bottom point as shown

Step 22: Emboss 3 dots below the previous 2 dots in last step
Step 23: Emboss 2 dots under 3 dots made in previous step.
Step 24: Emboss 1 dot under the 2 dots made in previous step to complete the embossed diamond shape.
Step 25: Repeat until you have an embossed diamond on the end of each star point.
Step 26: This picture shows how the snowflakz connect to make a border.

Step 27: Snowflakz border running along the bottom of the Winter Lace design.
Repeat the snowflakz border along the top of the design, use a ruler to line up your start point.
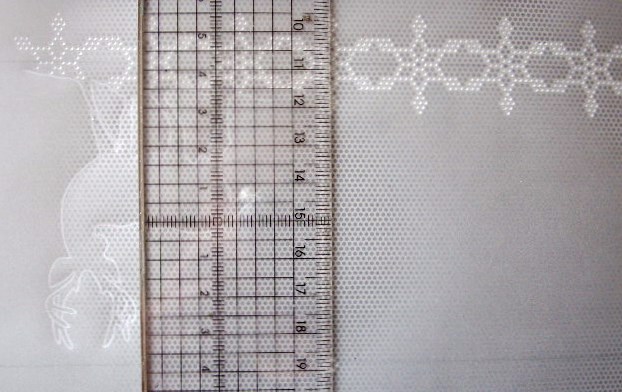
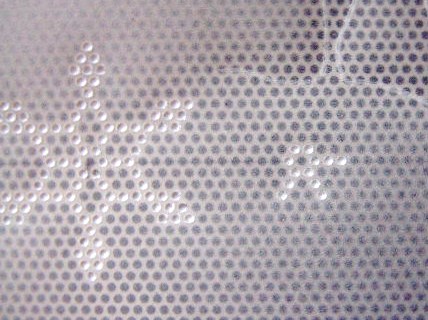
Emboss the left & Right borders using the 'Flower' shape from the centre of the snowflakz
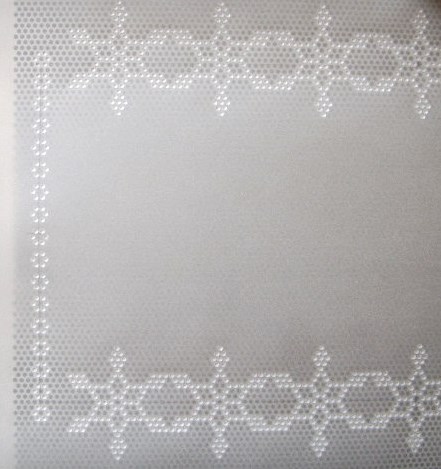
Leave a 1 hole space in between each flower shape

Replace the parchment back on the grid right side up aligning the embossed dots and perforate with a PCA Uni Bold tool
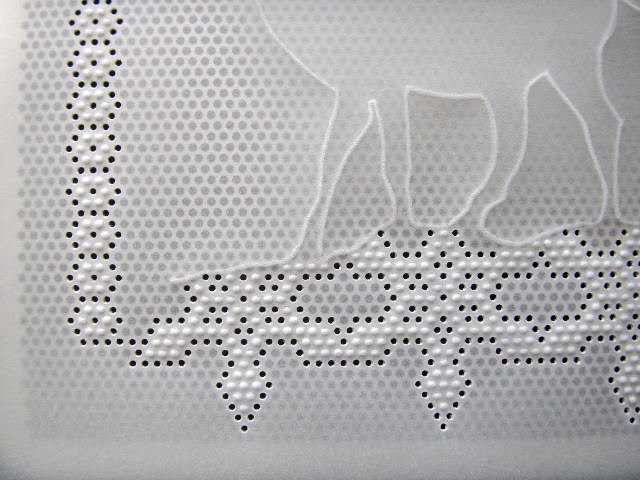
This picture shows a closer view of the perforating. Connect the side borders to the snowflakz with some additional perforations.
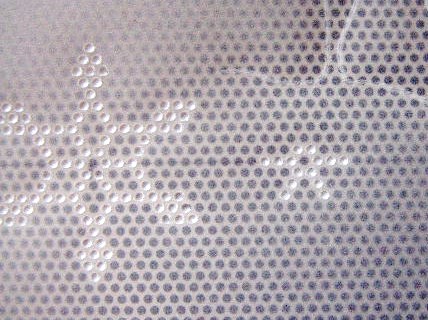
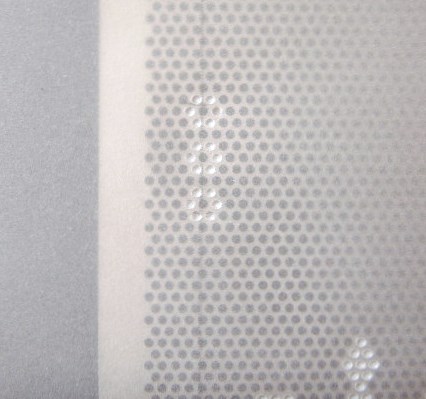
Using Pergamano Grid 24 (Diagonal) emboss some random star shapes inside the reindeer body as shown using a PCA Micro Ball
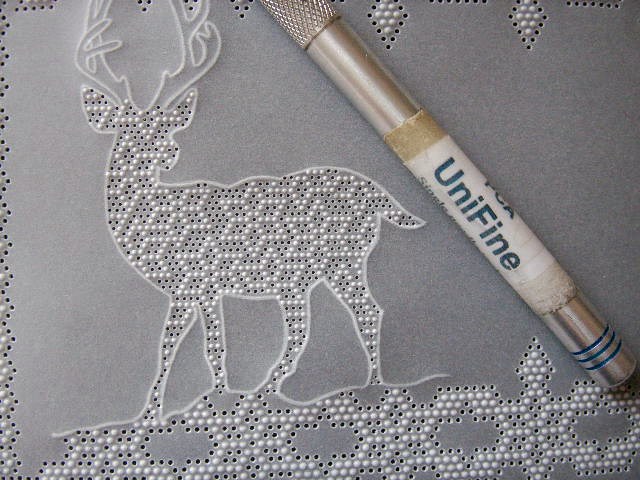
Replace back on the grid right side up, align the embossed dots and perforate every hole around the embossed dots using a PCA Uni Fine tool
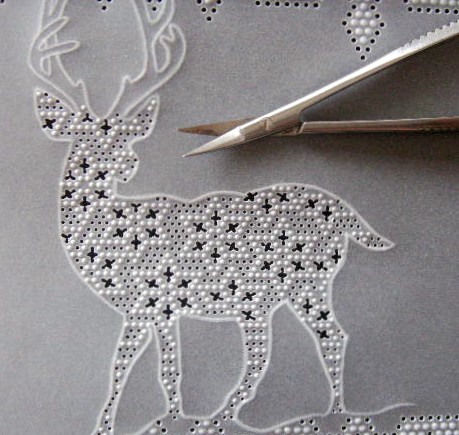
Using parchment craft scissors cut out the the 4 holes to make elongated crosses as shown.
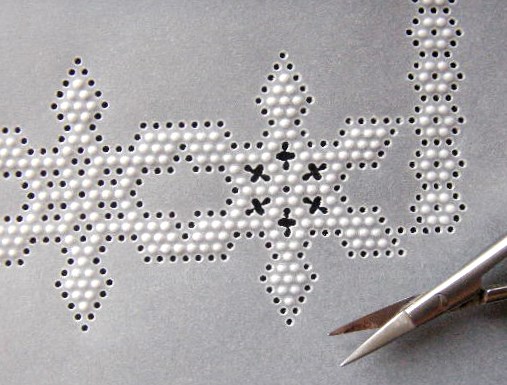
Cut out the 4 holes inside the snowflakz
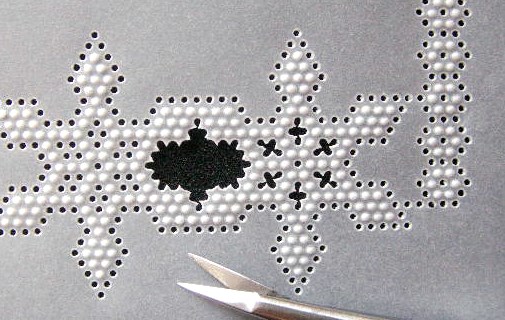
Cut out the sections in between the snowflakz as shown
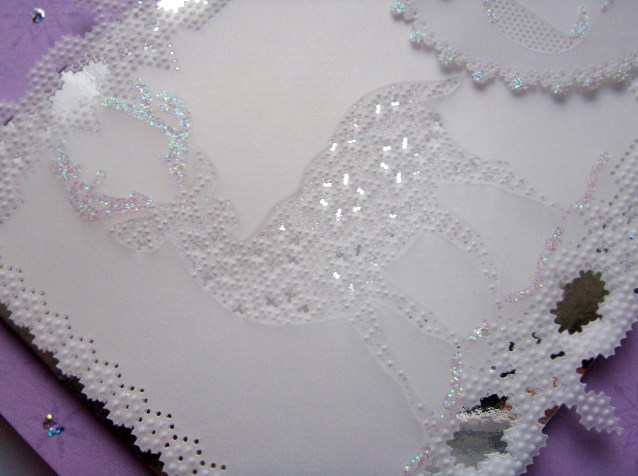
Cut around the outside perforations and take away the excess parchment as shown
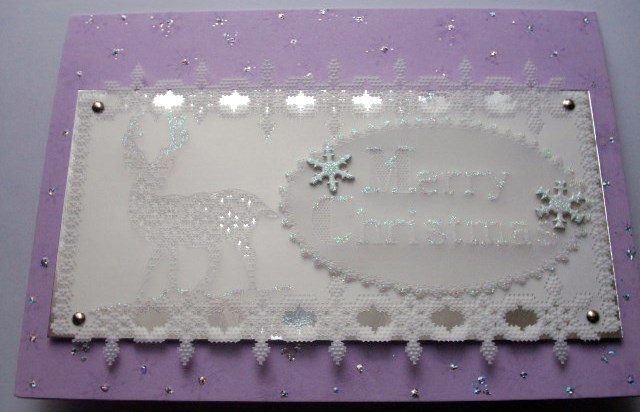
Attach the main design onto a piece of silver mirror card using mini silver brads in each corner.
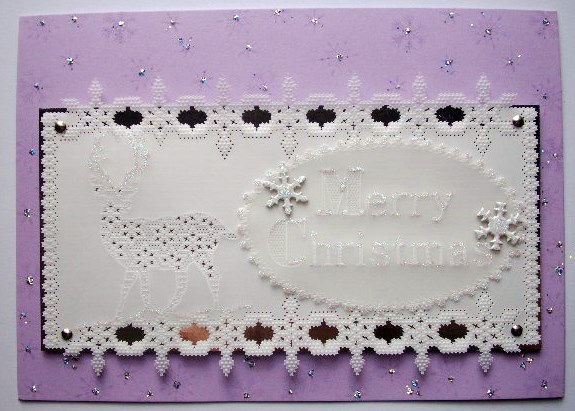
Attach to a folded A5 base card using 3D Foam Pads. I have stamped the base card with a snowflake by Card-io and Clear Embossing ink pad to leave a watermark effect and added glitter using Liquid Pearl Opal White & Diamantina by Jones Tones.
3 Dimensional Greeting Topper
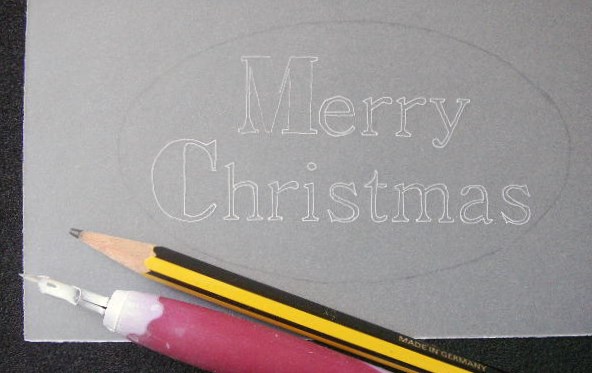
Trace the oval line in Graphite pencil and words with a mapping pen and white ink
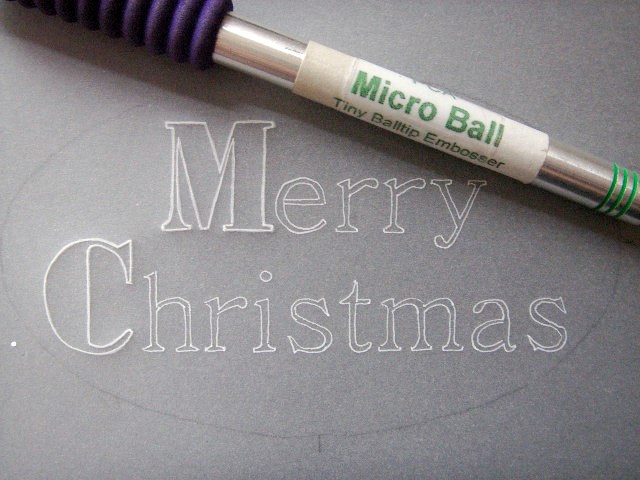
Emboss the lines of the capital letters using a PCA Micro Ball
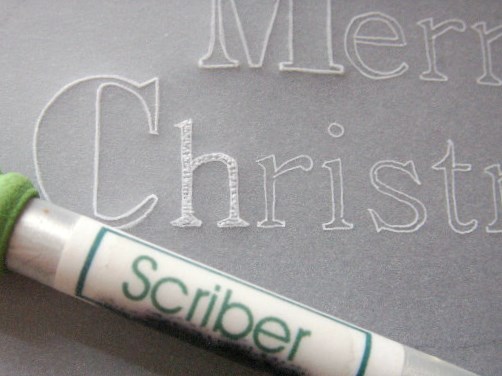
Emboss (Stipple Style) inside the other letters using a PCA Scriber tool
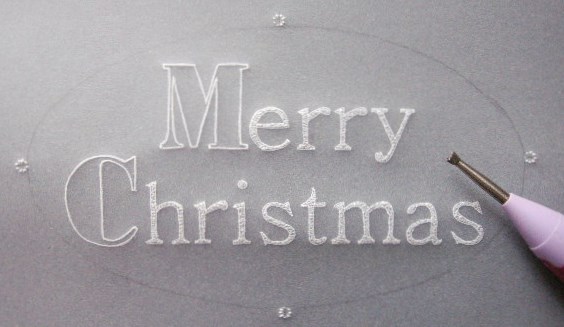
Emboss around the oval line from the back using a Pergamano 2mm Star tool, here I have at 4 points to mark the compass points.

Emboss all the way around the oval line as shown

Emboss another row of star shapes around the outer edge as shown
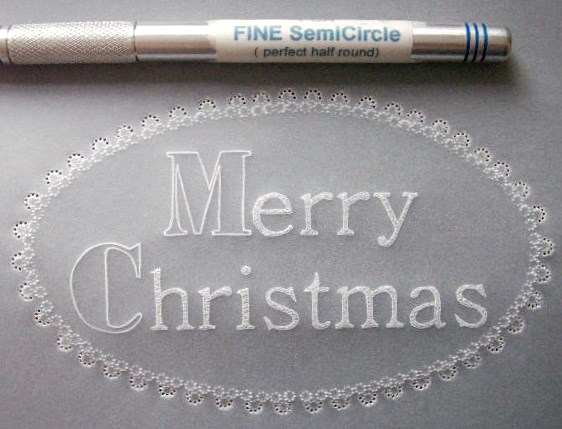
Perforate using a PCA Fine Semi Circle tool around the 2nd row of star shapes as shown
Perforate additional holes inside the centre of the star shapes in the 1st row and also in between the semi circle perforations in the 2nd row using a PCA Uni Fine tool

Place the greeting onto a Pergamano Grid 24 and perforate every hole inside the capital letters as shown.
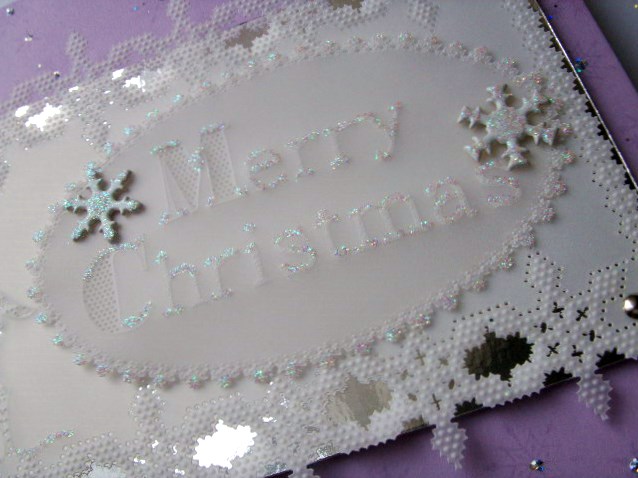
The greeting is cut out following the outer perforations and attached to the main design using snowflake brads, I have also added sparkle using a Quickie Glue Pen and fine crystal glitter on the letters and around the oval.
 RSS Feed
