
Parchment Craft Magazine February 2015

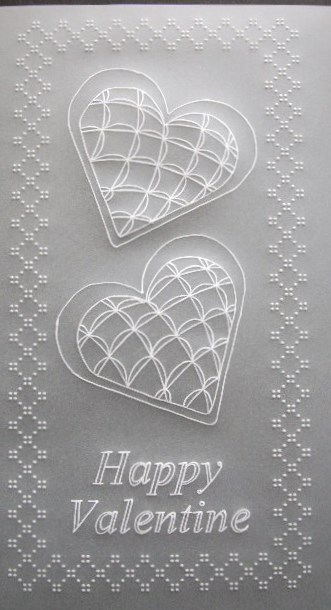
Lace pattern design called 'Malteze' add this to your library of grid patterns to use with any of your favourite images.
You will need: This pattern is only available in the Parchment Craft Magazine
Parchment craft paper
Graphite Pencil, Ruler & Eraser.
Pergamano White Gel Pen
Pergamano Grid 28
Pergamano 2 Needle Tool
Embossing & Perforating Mats
PCA Uni Bold Perforating Tool
PCA Uni Fine Perforating Tool
PCA Small Ball Tool
PCA Micro Ball Tool
PCA Micro Sun Tool
Parchment Craft Scissors
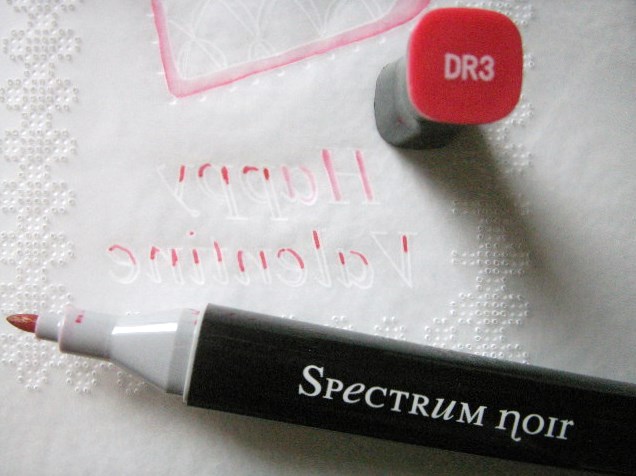
Spectrum Noir Pen DR3 (Red)
Spectrum Noir Blender Pen
Parchment craft paper
Graphite Pencil, Ruler & Eraser.
Pergamano White Gel Pen
Pergamano Grid 28
Pergamano 2 Needle Tool
Embossing & Perforating Mats
PCA Uni Bold Perforating Tool
PCA Uni Fine Perforating Tool
PCA Small Ball Tool
PCA Micro Ball Tool
PCA Micro Sun Tool
Parchment Craft Scissors
Spectrum Noir Pen DR3 (Red)
Spectrum Noir Blender Pen
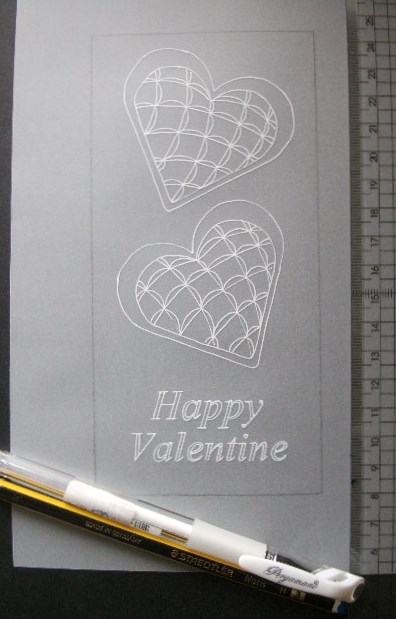
Attach the parchment over the pattern using a low tack tape.
Trace the outline border lightly using a graphite pencil & ruler.
NOTE: Trace lightly as you will need to erase this line later.
Trace the outline border lightly using a graphite pencil & ruler.
NOTE: Trace lightly as you will need to erase this line later.
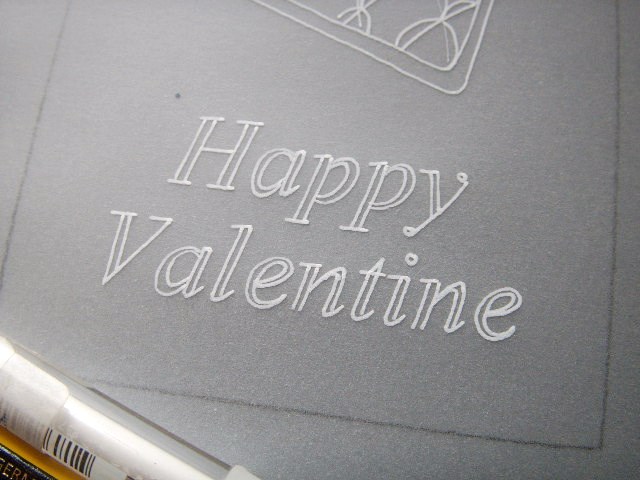
Trace the rest of the design with a Pergamano White Gel Pen’ try to achieve fine neat lines.
Emboss all traced lines using a PCA Micro Ball Tool
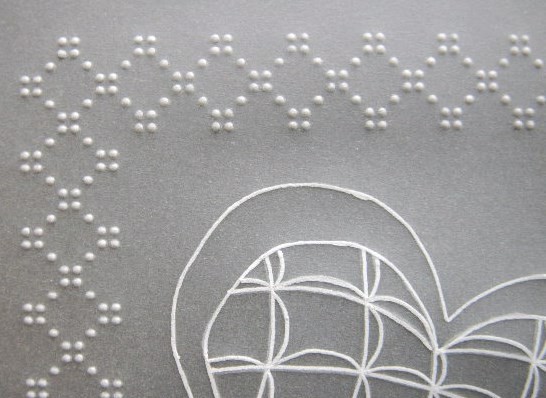
Secure your parchment onto the grid right side facing down. Pergamano Grid 28
Emboss with a PCA Small Ball Tool follow the grid pattern ‘Malteze’ starting in the bottom right hand corner and work around the border following your pencil line.
Emboss with a PCA Small Ball Tool follow the grid pattern ‘Malteze’ starting in the bottom right hand corner and work around the border following your pencil line.
Remove from the grid and erase the pencil line.

Grid Perforating
Place your parchment back on the grid right side facing up, carefully align the previously embossed dots with the holes on the grid.
Perforate inside the embossed shapes and also around the in and outside edges as shown in the grid pattern, using a PCA Uni Bold Tool.
Place your parchment back on the grid right side facing up, carefully align the previously embossed dots with the holes on the grid.
Perforate inside the embossed shapes and also around the in and outside edges as shown in the grid pattern, using a PCA Uni Bold Tool.
Emboss around the outer edge of the hearts using a PCA Micro Sun Tool, perforate inside each shape with a PCA Uni Fine Tool.

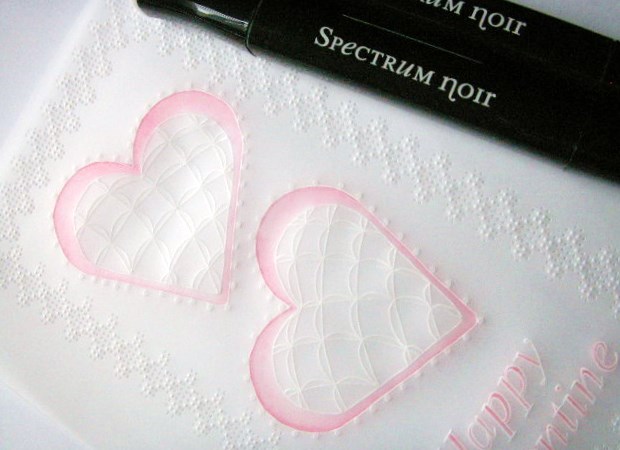
Adding Colour to your designs using 'Spectrum Noir Alcohol Pens'
Add colour on the back in-between the double lines of the hearts and inside the lettering.
Add colour on the back in-between the double lines of the hearts and inside the lettering.
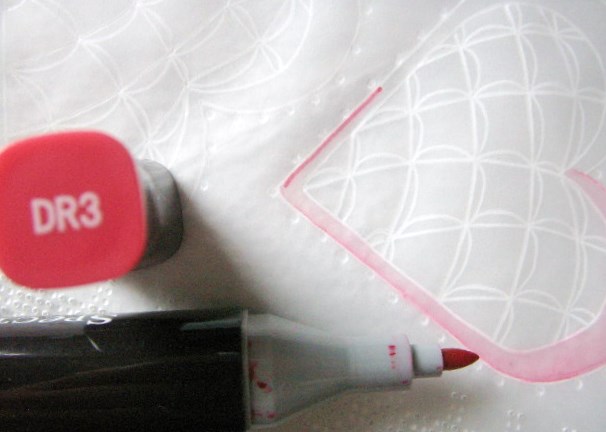
Apply a line of colour to the outside edge only using the bullet tip of the pen; blend the colour downwards into the rest of the space using an alcohol blender pen.
TIP: Clean the colour from the blender pen by wiping the nib on a piece of kitchen paper.
TIP: Clean the colour from the blender pen by wiping the nib on a piece of kitchen paper.
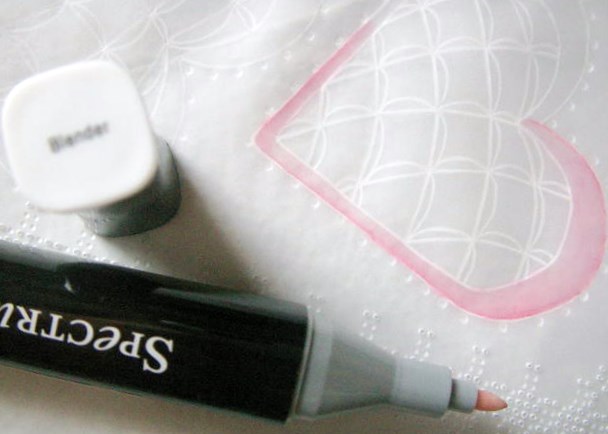
Using an alcohol blender pen, blend the colour downwards into the rest of the space.

Perforate Inside the quilted section in the hearts using a Pergamano 2 Needle Tool
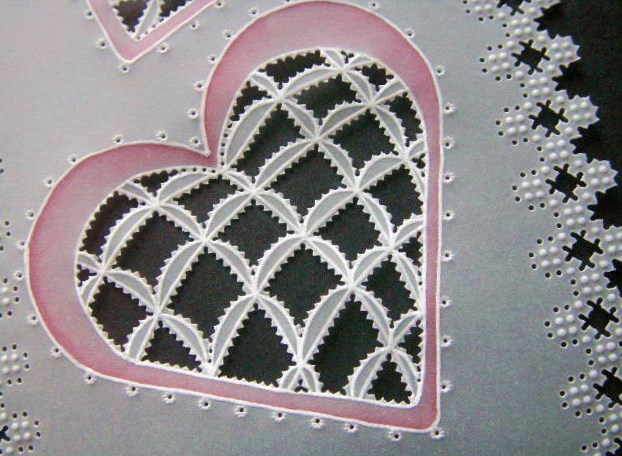
Cut out perforated sections from last step also inside and outside lace border.
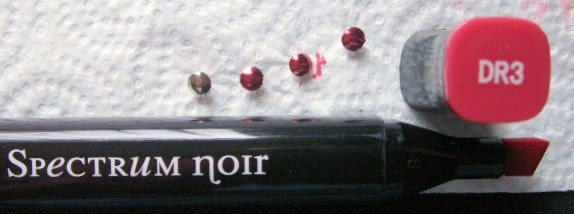
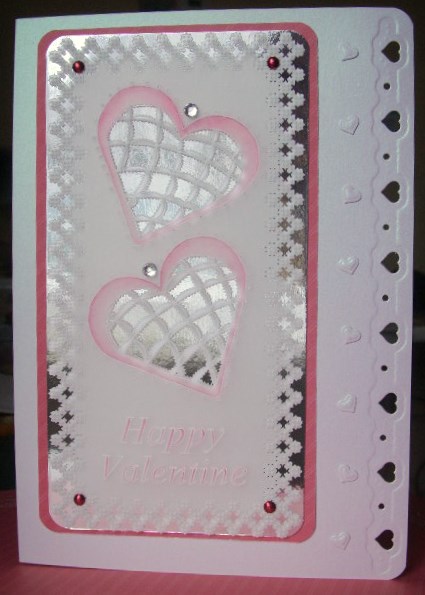
Attach the main design onto a piece of silver mirror card using mini silver brads that have been coloured with the same Spectrum Noir pen.

This design can be used for a modern Wedding card, Anniversary, Birthday, Engagement or maybe even ‘Twins’
I hope you have enjoyed this tutorial keep a look out for more!
Please go to my Facebook page and post your version of this design I would love to see it.
My Face Book Page
Please visit the Parchment Craft Magazine website
I hope you have enjoyed this tutorial keep a look out for more!
Please go to my Facebook page and post your version of this design I would love to see it.
My Face Book Page
Please visit the Parchment Craft Magazine website
 RSS Feed
