
Loopy Butterfly Lace Work
Step by Step Lesson by Wendy Walters
In this lesson I show you how I used the 'Grid Pattern Guide - 4 Petal Flower' to create the delicate lace work in the centre of the 'Loopy Butterfly' parchment craft pattern.

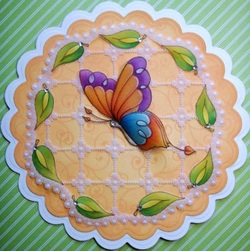
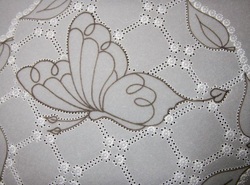
A very pretty 3 dimensional colourful butterfly design
In this step by step lesson I show you how to use the 'Grid Pattern Guide' - 4 Petal Flower to make this very delicate and open lace work surrounding the butterfly.
In this step by step lesson I show you how to use the 'Grid Pattern Guide' - 4 Petal Flower to make this very delicate and open lace work surrounding the butterfly.
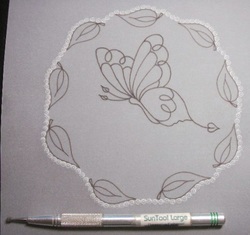
After you have traced the pattern using a fine black liner pen you emboss around the border with a PCA Large Sun Tool following the traced leaves
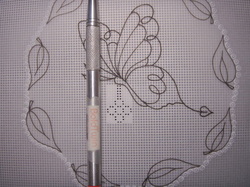
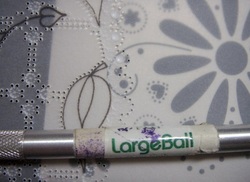
Now for the lace work using a PCA Bold Straight Grid and Uni Bold tool
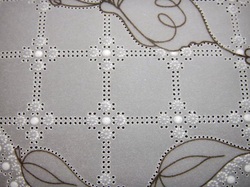
Attach the Grid Pattern Guide following the instructions given in the pack, and start to perforate from the centre.
Attach the Grid Pattern Guide following the instructions given in the pack, and start to perforate from the centre.
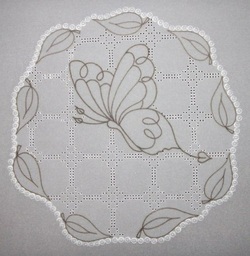
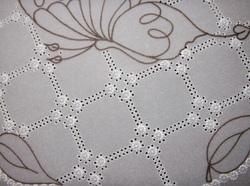
This picture shows how your lace should look when it is finished
Emboss the sections of the lace work using the PCA Large Sun Tool
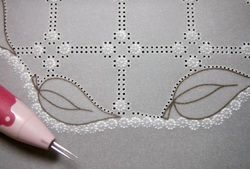
Perforate around the edges of the leaves with a 2 Needle Tool
Perforate around the edges of the butterfly
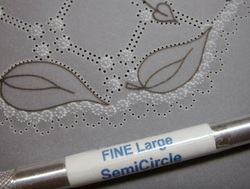
Perforate around the border sun shapes with a PCA Fine Large Semi Circle Tool
Emboss a dot inside each semi circle shape using a small hole from a pre patterned grid.

This picture shows the embossed dots inside the semi circle shapes
Using the same pre patterned grid embossed a dot inside the centre of the lace flower shapes.
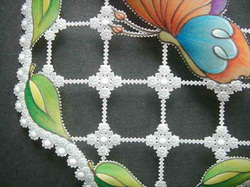
Cut out the lace as shown to leave a delicate open work lace design.

Add colour to the butterfly sections and leaves.

Attach the 3D sections to the main butterfly.

I hope you have enjoyed this FREE lesson and it as inspired you to have a go
