

Parchment Craft Magazine September 2014
Step by Step Instructions

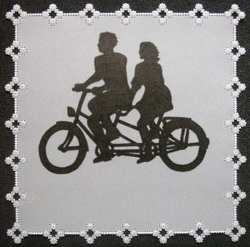
This design was inspired by me and my husbands new hobby, we became 'Tandemists' it wasn't until we became interested in tandems that we realised how many people enjoy this hobby to.
The greeting can be changed to suit another occasion
The pattern is in the September issue of the Parchment Craft Magazine 2014.
I have taken pictures at each stage so you can follow it 'Step by Step' below.
The greeting can be changed to suit another occasion
The pattern is in the September issue of the Parchment Craft Magazine 2014.
I have taken pictures at each stage so you can follow it 'Step by Step' below.
Trace the border line using a Graphite Pencil & Ruler.
The first step is the 'Grid Perforated Border'
You will need a Pergamano Grid 28, PCA Bold Twin Tool or a Bold Gauge Single needle tool.
Perforating Mat.
Secure the parchment onto the grid carefully aligning the pencil line with the holes on the grid.
The first step is the 'Grid Perforated Border'
You will need a Pergamano Grid 28, PCA Bold Twin Tool or a Bold Gauge Single needle tool.
Perforating Mat.
Secure the parchment onto the grid carefully aligning the pencil line with the holes on the grid.

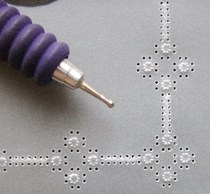
Start in the bottom right hand corner, following the grid pattern provided in the magazine.
If you have the 'Grid Pattern Guide - 4 Petal Flower' attach under your grid and follow the instructions given in my
'Video Tutorials - Grid Pattern Guides'
Continue connecting the patterns until you have completed a lace frame.
If you would like more information on my 'Grid Pattern Guides' please email me: [email protected]

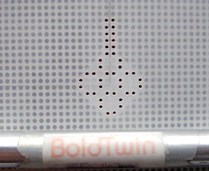
This picture shows how to turn a corner simply change the direction of the connecting dots to move along the pencil line.

This picture shows the completed perforated lace frame.
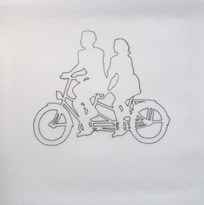
Trace the image by placing your parchment back over the pattern and secure in place with a low tack tape.
Using a Black Micron Pen 02 carefully trace the outline .
Using a Black Micron Pen 02 carefully trace the outline .

Trace the words on a separate piece of parchment, trace the outline border in pencil.

Using a black micron pen 08 fill in the image silhouette from the front.
To give the image silhouette more depth fill in on the back.
You can use the 02 pen it just takes longer to do.
To give the image silhouette more depth fill in on the back.
You can use the 02 pen it just takes longer to do.

Emboss inside the 4 petal shapes from the back using the Pergamano 2mm Star Tool or any other version of this tool you may have.
Emboss from the back in between the double row of connecting holes using a PCA Medium Ball Tool or similar.
Re Perforate these holes before cutting as they will get squashed during when embossing.
TIP: Place your work back onto the grid and carefully align the holes and re perforate, this will prevent the parchment from splitting
Re Perforate these holes before cutting as they will get squashed during when embossing.
TIP: Place your work back onto the grid and carefully align the holes and re perforate, this will prevent the parchment from splitting
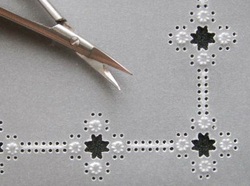
Cut out the centre parts of the flower
TIP: Cut the 4 pairs of holes first and then the diagonal holes.
Imagine you are in the centre and cut around yourself, hope that makes sense?
TIP: Cut the 4 pairs of holes first and then the diagonal holes.
Imagine you are in the centre and cut around yourself, hope that makes sense?
Cut around the outer perforations and your project should now look like this.

Place the words onto the same grid, right side down.
Emboss a single row of holes following your pencil line.
Remove from the grid and erase the pencil line.
Place back on the grid carefully aligning your embossed dots with the holes on the grid.
Emboss a single row of holes following your pencil line.
Remove from the grid and erase the pencil line.
Place back on the grid carefully aligning your embossed dots with the holes on the grid.
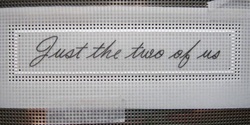
Perforate a double row of holes around the outer edge of the previously embossed dots using a PCA Bold Twin Tool or similar.
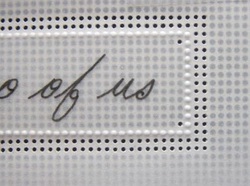
Perforate another 4 single holes on the inside corners.
These holes will be used for attaching this topper to its background card.
These holes will be used for attaching this topper to its background card.

Cut out the word topper following the outer perforations using parchment craft scissors.

These next steps show you how to make the sunset background.
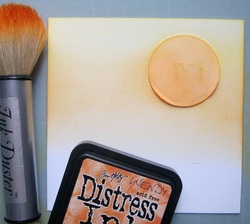
Cut a piece of white smooth card 13 x 13cm or big enough to fit inside the lace frame.
Cut a paper circle shape for the sun, you can use a punch or die cut.
Secure the circle to the card using a low tack tape and position behind the 'Stoker' (this is the name of the person on the back of the tandem), for those who are interested the person at the front is called the 'Captain or Pilot'
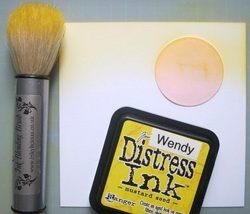
Using a brush and distress ink Mustard Seed lightly brush over the card starting at the top this will be the sky.
Add another colour to the sky 'Spiced Marmalade' under the first colour and blend, you don't want to separate colours.
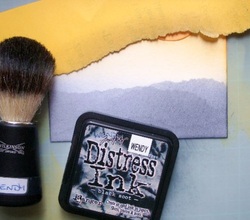
Add colour for the hills using Distress ink Black Soot.
Tear a piece of paper into a hill shape.
Place the paper so you are covering the sky, hold in place with your hand and add the black ink to create an hillside, you can move the paper so it makes a distant hill.
If you have not done this technique before have a little practice first.
Tear a piece of paper into a hill shape.
Place the paper so you are covering the sky, hold in place with your hand and add the black ink to create an hillside, you can move the paper so it makes a distant hill.
If you have not done this technique before have a little practice first.
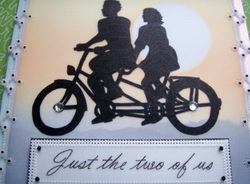
Add colour to the embossed start shape inside the lace frame using a Sakura Black Glaze Pen, when dry emboss from the back this will make them look like tiny black beads.
Assemble your parchment onto the setting sun background by sewing with a needle and white cotton around inner perforations of the lace frame.
Attach this onto a folded 6" x 6" base card using an All Purpose Glue or Double sided tape.
Assemble your parchment onto the setting sun background by sewing with a needle and white cotton around inner perforations of the lace frame.
Attach this onto a folded 6" x 6" base card using an All Purpose Glue or Double sided tape.
For the words cut a piece of silver mirror card slightly larger than the parchment.
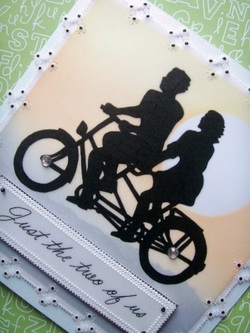
Sew onto the card through the additional inside corner perforations, using a needle and black cotton.
Attach it to the main design with 3D foam pads.
I also added tiny crystal to the centres of the wheels.
Sew onto the card through the additional inside corner perforations, using a needle and black cotton.
Attach it to the main design with 3D foam pads.
I also added tiny crystal to the centres of the wheels.

I hope you will enjoy making this design and I would love to see your interpretation of it, you can either post on my Facebook page or the Parchment Craft Magazine Facebook page links below.
Wendy's Face Book Page
Parchment Craft Magazine Face Book Page
Wendy's Face Book Page
Parchment Craft Magazine Face Book Page
 RSS Feed
