
Design by Wendy Walters

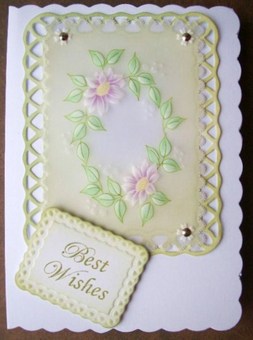
Parchment Craft Daisy Oval Card design
Level - Beginner
It involves the basic techniques:
It involves the basic techniques:
- Aligning your work on the grid
- Grid Embossing
- Grid Perforating
The lesson includes:
- Pattern: Daisy Oval
- Step by Step pictorial and written instructions at each stage
- Hints & Tips along the way
| free_parchment_craft_pattern_daisy_oval.pdf |
Tools & Equipment you will need:
- Parchment craft paper
- Graphite Pencil & Ruler
- Pergamano Multi Grid 20
- Embossing Mat
- Perforating Mat
- PCA Micro Ball
- PCA Uni Fine 1 Needle Perforating Tool
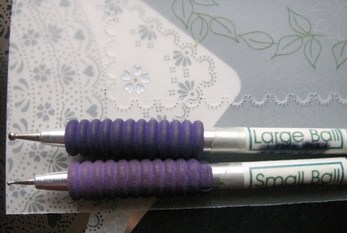
- PCA Large Ball Tool
- PCA Medium Ball Tool
Technique: Using pre patterned grids to create borders and decorative elements.
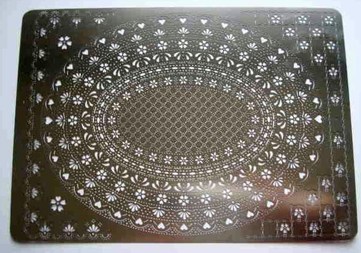
Pergamano Grid Number 20
Here is a picture of the Pergamano Grid 20 the over pre patterned shape is an oval, it also as corner designs, hearts, flowers, lace patterns and even perforating holes that resemble styles of tools so this section can be used instead of the tool, which is saving you money! There are several tool shapes on this grid and it’s much easier in my experience to line up with the grid than the tool itself.
Pergamano have a wide range of pre patterned ‘Multi Grids’ which you could use for this technique, they take the thinking out of grid work as the patterns are already on the grid, all you need to do is follow the lines and the holes to emboss or perforate.
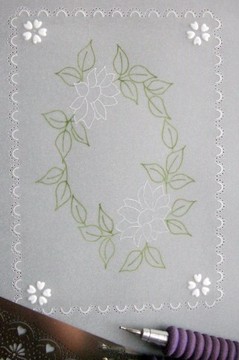
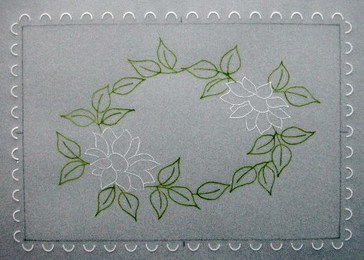
You can use sections of a grid to create a border around an image you have traced, like I have done here with the daisies.
The grids are also useful for adding small details to a design, choosing a small shape to emboss or perforate creating more personalised projects.
Before you buy a grid don’t just look at the overall patterns with in it, also look at some of the smaller details.
Link to my Video Tutorial 'Inline Technique'
/inline-technique.html
/inline-technique.html
Step 1
Step 1: Mark the centre points of your pencil border lines
Place your grid onto an embossing mat, secure your parchment right side down on top of the grid aligning the bottom left hand corner of your design with the corner section on the grid as shown and your centre marks with the centre of an arc on the grid
Emboss the curved lines using a PCA Micro Ball Tool until you reach your centre marks along the bottom and left hand sides. At this point you need to remove it from the grid and turn your work to complete the other sides
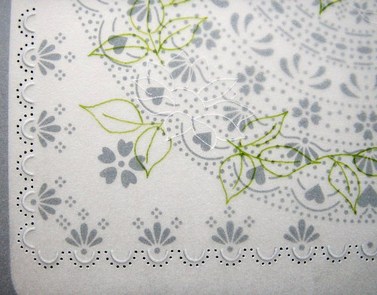
Here is a picture of the completed embossed border taken from the front; you can now erase away your pencil lines.
TIP: When erasing graphite pencil, place your work on a hard surface and a piece of white paper under your parchment, you will be able to see the pencil much clearer.
TIP: When erasing graphite pencil, place your work on a hard surface and a piece of white paper under your parchment, you will be able to see the pencil much clearer.
Step 2
Step 2:
Perforating - Re attach the parchment right side up carefully aligning your embossing and secure in place.
Place a perforating mat under your work.
Perforate around the border following the holes on the outside edge of your embossing using a PCA Uni Fine perforating single needle tool.
NOTE: You will need to re position for each corner
Step 3:
The next stage involves embossing a flower from the same grid into each corner of your design.
Place your grid onto an embossing mat, position your work over the flower right side down, so it sits in the corner.
Emboss the petals gently using a PCA Large Ball Tool (1st layer) and a PCA Medium ball tool for the 2nd layer.
TIP: When embossing shapes or lines from a grid always use the largest ball tool possible for your first layer and smaller sizes ball tools for additional layers to add whiteness and definition.
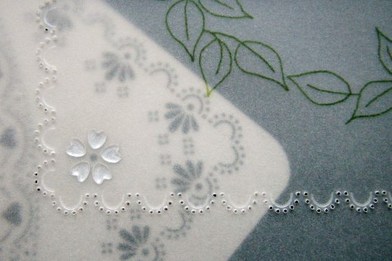
NOTE: The picture shows all the corner flowers embossed taken from the front. I didn’t emboss the centre dot because I am going to use this to assemble my design using a small brad.
Now you have worked through this process you can see what I mean about using grids to work for you in a different and more personalised way.
The next stage involves embossing a flower from the same grid into each corner of your design.
Place your grid onto an embossing mat, position your work over the flower right side down, so it sits in the corner.
Emboss the petals gently using a PCA Large Ball Tool (1st layer) and a PCA Medium ball tool for the 2nd layer.
TIP: When embossing shapes or lines from a grid always use the largest ball tool possible for your first layer and smaller sizes ball tools for additional layers to add whiteness and definition.
NOTE: The picture shows all the corner flowers embossed taken from the front. I didn’t emboss the centre dot because I am going to use this to assemble my design using a small brad.
Now you have worked through this process you can see what I mean about using grids to work for you in a different and more personalised way.
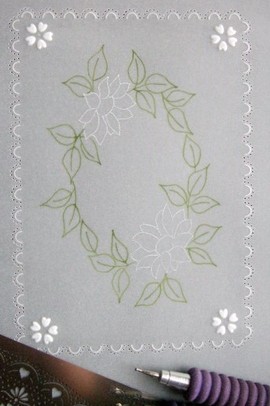
Completed border and corner embellishments
I hope you have enjoyed this lesson on ‘How to use Pre Patterned Grids’
If you have any questions please do not hesitate to ask.
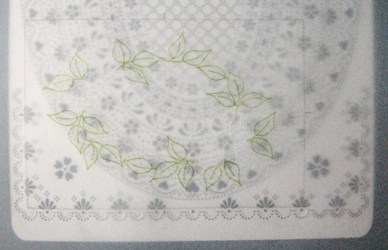
The next stage of this project is ‘Embossing Graduated Style’ see picture.
If you have any questions please do not hesitate to ask.
The next stage of this project is ‘Embossing Graduated Style’ see picture.
 RSS Feed
