
Design by Wendy Walters

This project was put together by Wendy Walters and will explain to you how to use ‘Mapping pen and inks’. This lesson is ideal for the complete beginner in parchment craft. It will cover a few basic techniques which you will find useful for other projects.

Daisy Oval Card design
It involves the basic techniques:
- Prepare your mapping pen
- Loading the nib with ink
- 10 Tips on tracing to improve your technique
- Cleaning and protecting your nib
The lesson includes:
- Pattern: Daisy Oval
- Step by Step pictorial and written instructions at each stage
- Hints & Tips along the way
| free_parchment_craft_pattern_daisy_oval.pdf |
Tools & Equipment you will need:
- Parchment craft paper
- Scouring sponge or similar
- Container with a lid
- Kitchen paper
- Low tack tape
- Pergamano Mapping pen
- Pergamano Tinta White ink
- Pergamano Tinta Leaf Green ink

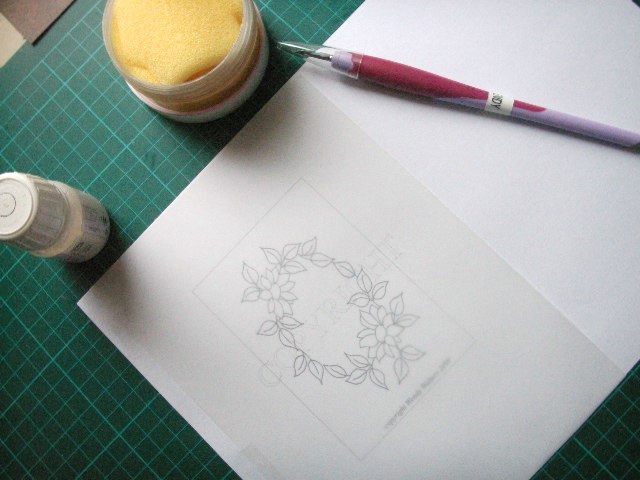
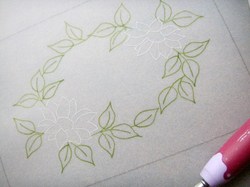
Step 1
Step 1: The picture above shows the completed traced ‘Daisy Oval’ using a mapping pen with white and leaf green inks.
This is a basic technique you can use for pattern tracing.
It does require practice to be able to achieve the fine hair like lines that are required.
This is a basic technique you can use for pattern tracing.
It does require practice to be able to achieve the fine hair like lines that are required.
Step 2
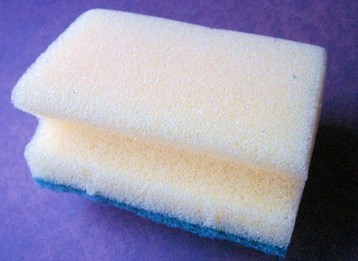
Step 2: Although this looks like an ordinary kitchen scouring sponge it’s a very important piece of equipment, this is what I use for cleaning the nib of my mapping pen.
Step 3
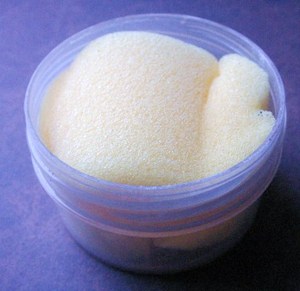
Step 3: Place your sponge inside a container preferably with a lid and then you can take it anywhere with you
NOTE: Remove the green scouring part of the sponge before placing into your container
TIP: Dampen your sponge with water
NOTE: Remove the green scouring part of the sponge before placing into your container
TIP: Dampen your sponge with water
Step 4
Step 4:
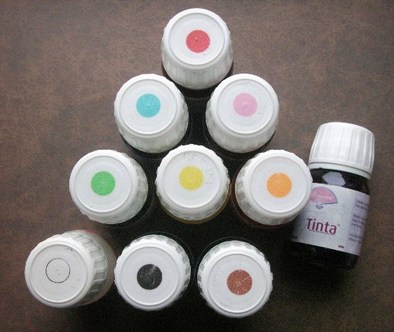
Pergamano have a wide range of drawing inks called ‘Tinta’ and the traditional one used for ‘White Work’ is the White Tinta ink, this as a chalky texture that usually sinks to the bottom so this always needs to be stirred or shaken before use.
TIP: Do not shake the ink up into the cap as this will dry and you will be unable to remove it, always shake from side to side or better still stir with a coffee stirrer or similar.
TIP: Place a small amount of Vaseline around the top of the ink bottle this will make it easier to remove the cap.
Step 5
Step 5:
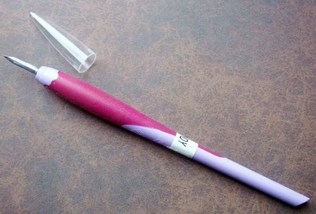
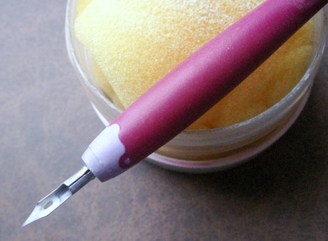
The Pergamano Mapping pen, there are other brands but in my opinion this is one of the best I have tried and is suitable for using with any drawing inks.
The nib is a ‘Split nib’ in other words it is in 2 separate pieces at the nib end, this enables it to draw up the ink.
You must take care of your nib as they are very delicate, the tool comes with a clear top which when your pen is not in use it helps protect the nib
NOTE: I must say if I am being honest these are not the strongest of tops, I put masking tape around mine to help strengthen it.
NOTE: When you first get your mapping pen the nib is inserted into the handle the wrong way, carefully pull the nib out and replace it back into the handle with the nib on the outside, I don’t know how many times people have asked me ‘Why doesn’t my pen does have a nib’. You can replace the nib back into the handle after use to protect it but make sure it is dry first otherwise it will rust.
Step 6
Step 6:
Print out the ‘Daisy Oval’ pattern.
Attach your parchment over the pattern using a low tack tape.
TIP: Only tape at the top or one side as you will need to keep lifting the parchment away from the pattern.
TIP: Make sure you have your work on a hard flat surface and have a good source of light.
Print out the ‘Daisy Oval’ pattern.
Attach your parchment over the pattern using a low tack tape.
TIP: Only tape at the top or one side as you will need to keep lifting the parchment away from the pattern.
TIP: Make sure you have your work on a hard flat surface and have a good source of light.
Step 7
Step 8
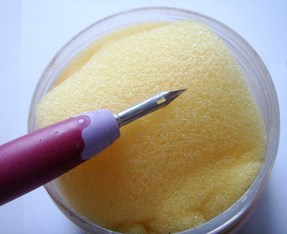
Step 7:
Preparing the nib before tracing:
Gently wipe the nib over the damp sponge this will help the ink flow from the nib.
TIP: Do not stab the nib into the sponge as this will damage the nib
Preparing the nib before tracing:
Gently wipe the nib over the damp sponge this will help the ink flow from the nib.
TIP: Do not stab the nib into the sponge as this will damage the nib
Step 8:
Loading the nib with ink:
Shake or stir your white ink and remove the cap, dip the nib into the ink up to the ‘Well’ this is the hole just above the split nib.
NOTE: 2 reasons why you don’t dip the nib in to the ink above the well
1. The ink dries quickly and the ink is wasted.
2. You run the risk of it blobbing (Technical term) onto your work either way it’s not good.
Step 9
Step 9:
Tracing onto parchment: 10 Tips to help improve your technique
TIP 1: It’s a good idea to get into the habit of putting a piece of kitchen paper under your hand that is in contact with the parchment, this helps to prevent marks from moisture from your skin. Good general rule.
TIP 2: Never apply hand cream just before you are about to do your parchment craft. Good general rule.
TIP 3: Make sure your elbows are on the table this will stabilise your hands, most people say they can’t trace without wobbling but this is usually because you are holding your arm up at the shoulder.
TIP 4: Always work with your body in the same position and constantly turn your work, don’t try to work with your body twisted.
TIP 5: Do not tape your work to the table or craft mat, make sure it is easy and free to move. Good general rule.
TIP 6: Holding the pen as upright as possible is essential to achieve the fine lines required, if you hold it like a normal pen the pressure will cause the split nib to separate and will make thick lines, which you don’t want.
TIP 7: Trace with the nib sideways on, this will make the nib fine at this angle, which in turn will achieve very fine lines, which you do want.
TIP 8: Light pressure is vital when tracing barely touching the parchment; you should glide over the parchment like an ice skater and with confidence.
TIP 9: I always trace with the pen movements coming towards my body, do not trace backwards as this can sometimes make the pen judder and create inks splatters.
TIP 10: If the ink dries on the nib do not go to re load the nib, always clean the nib on the damp sponge and then re load, if you don’t clean the nib each time you will build up the ink on the nib and this will thicken it and you will not be able to trace fine lines.
‘Oh my word’ I can hear you saying that’s a lot to take in, these are all the things I have picked up on in my 10 years of teaching and I can now pass them on to you, having said all this you will find your own way of achieving the results you are happy with, use the ‘TIPS’ as a guide line.
I suggest that you practice tracing just one flower over and over until you are happy.
TIP: When you have finished tracing clean your nib and leave to air dry, do not wipe with a piece of kitchen paper or cloth, you can easily damage your nib. Put your tool cap on when the nib is dry or replace the nib the wrong way round into the handle.
NOTE: I have found that a slightly dirty nib holds the ink better so don’t get uptight about cleaning your nib so it looks like new.
NOTE: Do not get disheartened if your traced lines did not come out fine the first time, it’s one of the techniques which do require lots of practice.
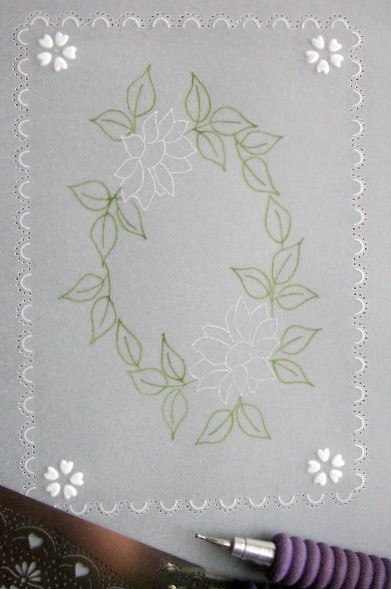
 Step 10
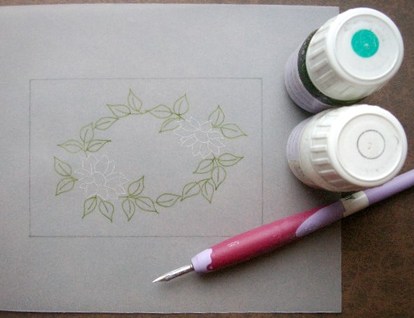
 Step 10:
This picture shows all the tracing completed including the leaves which have been traced in the Tinta ink Leaf Green, tracing with these are exactly the same procedure as the white ink, they don’t need shaking. You will find the coloured inks easier to work with and flow better.
I hope you have enjoyed this lesson on ‘How to use a Mapping Pen & inks’
If you have any questions please do not hesitate to ask.
The next stage of this project is ‘How to use Pre Patterned Grids’ for a border and decorative elements.
Parchment Craft - Daisy Oval Card - Stage 2 Using Pre Patterned grids
 RSS Feed
