
Design by Wendy Walters

This project was put together by Wendy Walters and will explain to you how to ‘Embossing Graduated Style’. This lesson is ideal for the complete beginner in parchment craft. It will cover a few basic techniques which you will find useful for other projects.

Technique Embossing 'Graduated Style' inside flower petals & leaves.
Level - Beginner
It involves the basic techniques:
It involves the basic techniques:
- Graduated style embossing
- Building layers of embossing to show highlights and shadows
- Decorative embossing
The lesson includes:
- Pattern: Daisy Oval
- Step by Step pictorial and written instructions at each stage
- Hints & Tips along the way
| free_parchment_craft_pattern_daisy_oval.pdf |
Tools & Equipment you will need:
- Parchment craft paper
- Embossing mat
- PCA Large ball tool
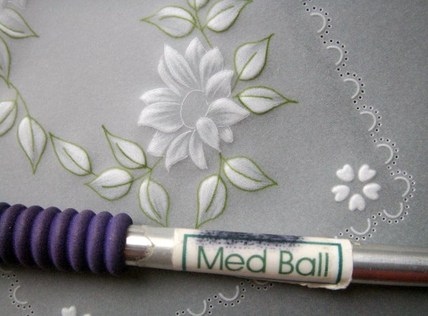
- PCA Medium ball tool
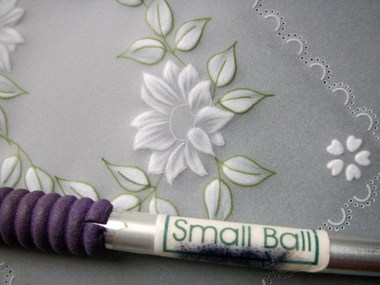
- PCA Small ball tool
- PCA Micro sun tool
- PCA Large sun tool
- Tumble drier sheet
- Kitchen paper
Step 1
Step 1: What is Graduated Embossing? – It is an embossing technique that allows you to create highlights and shadows within a design element such as a petal; leaf, fabric folds, wings etc. using embossing tools and I have used ball tools on this occasion. This style of embossing is gradually built up in layers using a variety of different sized ball tools.
‘Graduated’ is the word I use for this style of embossing it can also known as shading or feathering.
Explanation of the movement: A flicking motion similar to striking a match.
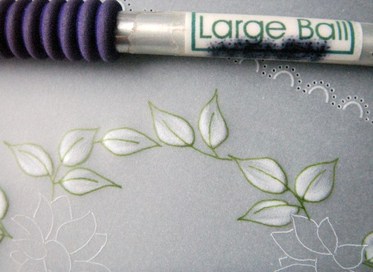
Embossing the leaves: Applying two layers using the PCA Large ball tool & PCA Medium ball tool on the back.
TIP: Make sure you have rubbed over the back of your parchment with a tumble drier sheet, this will help the ball tool glide over the parchment.
Highlights & Shadows: When using this style of embossing you need to decide where you want the highlights (the whitest areas) and the shadows (the dark areas and the natural unembossed parchment) to be, once you have done this you can start to emboss.
Start Position: Hold your ball tool on the parchment at your chosen highlighted area, if you take a closer look at the picture you can see that I have started at the base of the leaf (this is the whitest highlighted part) and the embossing graduates to nothing as it reaches the tip of the leaf (the darkest shadow area)
I hope this is making sense so far?
Apply a light pressure with your ball tool at the base of the leaf and flick upwards and away from your body towards the leaf tip (don’t go right to the tip) see tip below.
MOVEMENT: Apply pressure, flick away, and lift off the paper like an aeroplane taking off, now there’s an image for you to remember.
TIP: Follow the natural lines of whatever you are embossing as this creates shape and finished effect.
NOTE: Use the largest ball tool possible for a first layer of embossing as this warms the parchment and stretches the fibres of the paper, all embossing is started off softly and you gradually build up the whiteness using slightly more pressure on successive layers or smaller sized tools, doing it this way keeps the parchment flatter.
IMPORTANT NOTE: You can always add more but you can’t take it away!
Emboss all the leaves with the first layer before moving onto the next step.
‘Graduated’ is the word I use for this style of embossing it can also known as shading or feathering.
Explanation of the movement: A flicking motion similar to striking a match.
Embossing the leaves: Applying two layers using the PCA Large ball tool & PCA Medium ball tool on the back.
TIP: Make sure you have rubbed over the back of your parchment with a tumble drier sheet, this will help the ball tool glide over the parchment.
Highlights & Shadows: When using this style of embossing you need to decide where you want the highlights (the whitest areas) and the shadows (the dark areas and the natural unembossed parchment) to be, once you have done this you can start to emboss.
Start Position: Hold your ball tool on the parchment at your chosen highlighted area, if you take a closer look at the picture you can see that I have started at the base of the leaf (this is the whitest highlighted part) and the embossing graduates to nothing as it reaches the tip of the leaf (the darkest shadow area)
I hope this is making sense so far?
Apply a light pressure with your ball tool at the base of the leaf and flick upwards and away from your body towards the leaf tip (don’t go right to the tip) see tip below.
MOVEMENT: Apply pressure, flick away, and lift off the paper like an aeroplane taking off, now there’s an image for you to remember.
TIP: Follow the natural lines of whatever you are embossing as this creates shape and finished effect.
NOTE: Use the largest ball tool possible for a first layer of embossing as this warms the parchment and stretches the fibres of the paper, all embossing is started off softly and you gradually build up the whiteness using slightly more pressure on successive layers or smaller sized tools, doing it this way keeps the parchment flatter.
IMPORTANT NOTE: You can always add more but you can’t take it away!
Emboss all the leaves with the first layer before moving onto the next step.
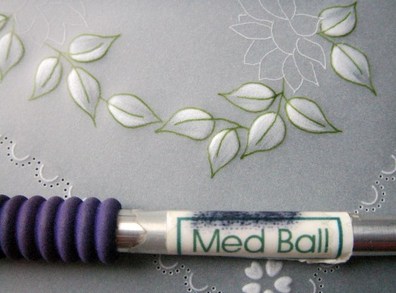
Step 2: Now you have done your first layer over all the leaves, you are now ready for the second layer and you need to change your ball tool to a PCA Medium ball.
Start embossing with your first leaf, same technique but this time only ‘One Half’ of the leaf, take a look at the picture you can see the effect this as it makes the leaf dimensional. Applying this second layer will whiten this half of the leaf giving it a natural shape.
** image 4**
The picture shows the difference between the first and second layers of embossing.
NOTE: You can always emboss more layers it is your preference, it is very much a personal choice.
TIP: As a beginner always turn your work over at regular intervals to see what you are achieving, this way you can correct yourself sooner rather than later!
Step 2
Step 2:
Now you have done your first layer over all the leaves, you are now ready for the second layer and you need to change your ball tool to a PCA Medium ball.
Start embossing with your first leaf, same technique but this time only ‘One Half’ of the leaf, take a look at the picture you can see the effect this as it makes the leaf dimensional. Applying this second layer will whiten this half of the leaf giving it a natural shape.
The picture shows the difference between the first and second layers of embossing.
NOTE: You can always emboss more layers it is your preference, it is very much a personal choice.
TIP: As a beginner always turn your work over at regular intervals to see what you are achieving, this way you can correct yourself sooner rather than later!
NOTE: You can always emboss more layers it is your preference, it is very much a personal choice.
TIP: As a beginner always turn your work over at regular intervals to see what you are achieving, this way you can correct yourself sooner rather than later!
Step 3
Step 3:
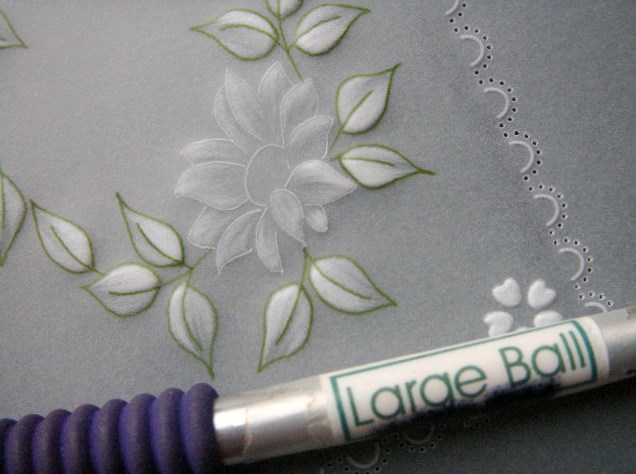
Embossing the flower petals: The petals have 3 layers using the PCA Large, Medium and Small ball tools.
Embossing flower petals can be tricky as you need to pay attention to the highlights and shadows, highlights can hit different sides of a petal depending where they are in the flower and where they are in your composition.
In this project I have kept it simple and applied most of the highlights at the tips of the petals. However there is only one petal that is right at the front which is highlighted on the top and tip as you can see the traced line is showing on all sides unlike the other petals which blend into the flower centre.
NOTE: You also need to leave a shadow in-between the petals, leaving the parchment unembossed; this will separate the petals and stop your flower looking like a white blob.
1st Layer: Start with the large ball tool and emboss all petals on both flowers.
Step 4
Step 4: 2nd Layer: PCA Medium ball tool emboss over your first layer further whitening the highlighted areas
NOTE: You can always emboss more layers; it’s like you a sketching a picture and slowly building up more depth as I have said before it’s very much a personal preference.
NOTE: You can always emboss more layers; it’s like you a sketching a picture and slowly building up more depth as I have said before it’s very much a personal preference.
Step 5
Step 5:
3rd Layer using a PCA small ball, I always think of this as a defining layer, if your traced lines are very fine they should now start to disappear into your embossing.
TIP: You can now start to emphasis the highlights on the edges of the petals that are on top in doing so this will push the under petals back giving your flower dimension.
I really hope this is still making sense.
Step 6:
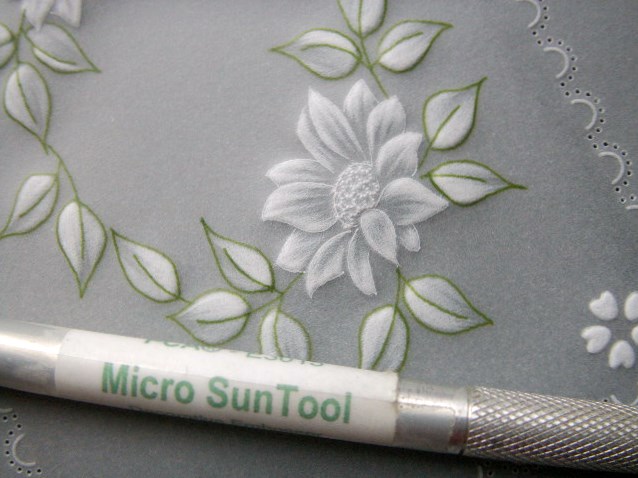
Embossing the flower centre: Using a PCA Micro Sun tool
Start to emboss around the traced line and then fill in the centre
TIP: How to use a ‘Sun Tool’ is explained in the ‘Decorative Envelope’ Lesson
NOTE: I have also used the PCA Large & Micro sun tools to ‘Decoratively Emboss’ around the Daisy Oval; they look like floating dandelion heads
Step 6

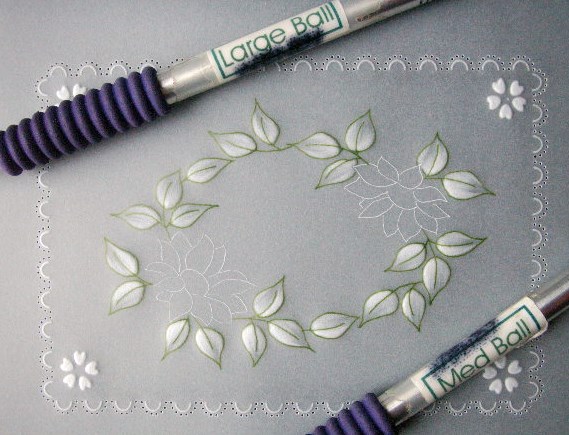
Completed embossing 'Graduated Style'
The picture shows all the ‘Graduated Embossing’ completed, I think this is a very nice technique to learn and again does require lots of practice, for me this is true parchment craft because the skill is to emboss a plain piece of parchment craft paper and create forms and shapes to make a picture…amazing!
I hope you have enjoyed this lesson on ‘Embossing Graduated Style’
If you have any questions please do not hesitate to ask.
The next stage of this project is ‘Adding colour with pencils’.
If you have any questions please do not hesitate to ask.
The next stage of this project is ‘Adding colour with pencils’.
 RSS Feed
