

Materials you will need:
Parchment Craft Paper - I have used 140gsm.
Blendable Pencils - I have used Faber Castell - Pink 119, Pink 125, Red 121, Dark Pink 134, Purple 141, Yellow 107, Yellow 109, Green 166, Green 167.
Pencil Sharpener, Graphite Pencil & Ruler.
Parchment Craft Paper - I have used 140gsm.
Blendable Pencils - I have used Faber Castell - Pink 119, Pink 125, Red 121, Dark Pink 134, Purple 141, Yellow 107, Yellow 109, Green 166, Green 167.
Pencil Sharpener, Graphite Pencil & Ruler.
Step 1:
Print out the pattern onto white copier paper.
Secure a piece of parchment craft paper over the pattern.
The pattern does have a border around the design you can trace this with a graphite pencil and ruler, this will give you a definite edge to either fold, cut or make a lace border, depending on what you will be using your fuchsia's for.
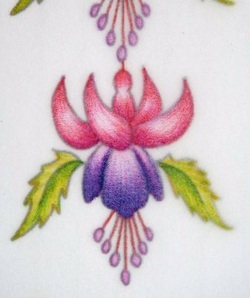
The flowers are not traced this is purely coloured with pencils.
Please make sure your pencils are very sharp and that you are working on an hard surface.
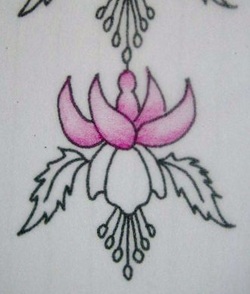
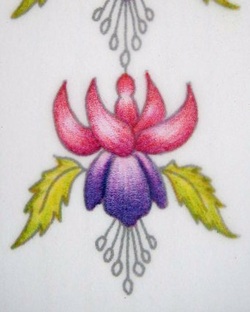
The first layer of colour is Pink 119 the picture shows the areas to colour the upper petals, follow the direction and shape of the petals, notice how I haven't filled in the whole area I have left areas of highlight.
Pencil Stroke Technique: The movement of your pencil is similar to 'Striking a Match' flicking the pencil lines away from you.
Apply pressure at the start of the stroke, then lift the pencil off the paper at the end of the stroke, make sure your pencil strokes are long and short and not all the same length.
TIP: You can create different depths of colour from one pencil by applying different pressure, practice on a scrap of parchment, you can also create more depth by applying several layers of the same colour. Can I suggest that you start applying colour with a light pressure this way you can build the depth gradually.
If you make a mistake you can erase away the colour.
Print out the pattern onto white copier paper.
Secure a piece of parchment craft paper over the pattern.
The pattern does have a border around the design you can trace this with a graphite pencil and ruler, this will give you a definite edge to either fold, cut or make a lace border, depending on what you will be using your fuchsia's for.
The flowers are not traced this is purely coloured with pencils.
Please make sure your pencils are very sharp and that you are working on an hard surface.
The first layer of colour is Pink 119 the picture shows the areas to colour the upper petals, follow the direction and shape of the petals, notice how I haven't filled in the whole area I have left areas of highlight.
Pencil Stroke Technique: The movement of your pencil is similar to 'Striking a Match' flicking the pencil lines away from you.
Apply pressure at the start of the stroke, then lift the pencil off the paper at the end of the stroke, make sure your pencil strokes are long and short and not all the same length.
TIP: You can create different depths of colour from one pencil by applying different pressure, practice on a scrap of parchment, you can also create more depth by applying several layers of the same colour. Can I suggest that you start applying colour with a light pressure this way you can build the depth gradually.
If you make a mistake you can erase away the colour.
Step 2:
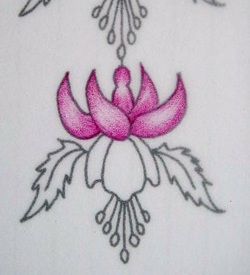
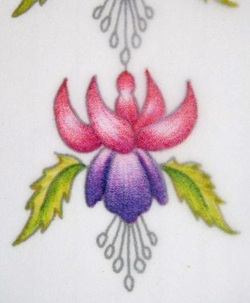
2nd layer of colour Pink 125 apply directly over the first layer.
You can see how much contrast this as added making the petals more dimensional, still leave an area uncoloured for an highlight.
TIP: Keep lifting your parchment away from the pattern to see what you are achieving as without the pattern lines underneath it will look very different.
Do not be tempted to draw in the pattern lines with your pencils as it will flatten the image and it will not look dimensional.
Step 3:
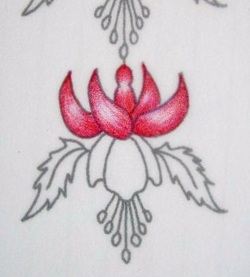
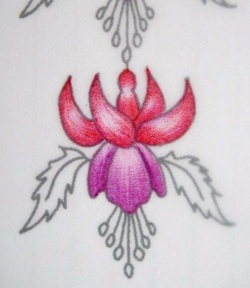
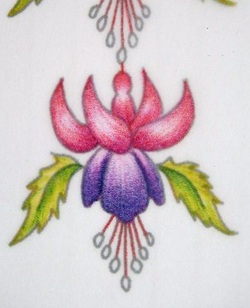
3rd layer of colour Red 121 apply over the last 2 layers, you should still have an highlighted area.
Lift the parchment away from the pattern to make sure you are creating the shapes of the petals.
3rd layer of colour Red 121 apply over the last 2 layers, you should still have an highlighted area.
Lift the parchment away from the pattern to make sure you are creating the shapes of the petals.
Step 4:
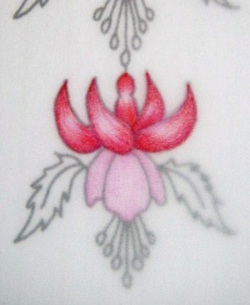
We are now colouring another section the lower skirt petals.
Pink 119 - You can apply the pencil strokes all over the 3 petals at this stage working from the bottom first and then down from the top - Turn your work so you a working in the same direction all the time (Flicking away from your body)
We are now colouring another section the lower skirt petals.
Pink 119 - You can apply the pencil strokes all over the 3 petals at this stage working from the bottom first and then down from the top - Turn your work so you a working in the same direction all the time (Flicking away from your body)

Step 5:
The nice thing about picture tutorials you can see the subtle difference of each additional layer of colour at each step.
The next layer Pink 125 from the bottom up.
When applying the colour at this stage you can see how I have applied more shading at each side to the back petals behind the front petal, this will make the front petal stand forward of the back petals.
Step 6:
Next layer Deep Pink 134 from the bottom up.
This layer adds more depth of colour and more depth to the back petal shadows.
Lift the parchment away from the pattern to make sure you don't have any missed areas.
Next layer Deep Pink 134 from the bottom up.
This layer adds more depth of colour and more depth to the back petal shadows.
Lift the parchment away from the pattern to make sure you don't have any missed areas.

Step 7:
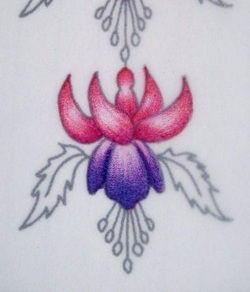
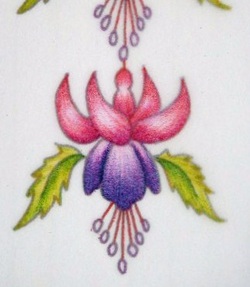
Purple 141, from the bottom up.
This picture clearly shows the highlighted area at the top of the petals and the shaded areas of the back petals.
TIP: Make sure your pencils are very sharp, this technique is built up through lots of fine pencil lines and the direction of your pencil lines create the shapes.
Step 8:
You can keep working over the area with the same pencil to add more depth of colour or apply more pressure.
Lift the parchment away from the pattern to make sure the edge of your petals are crisp.
You can keep working over the area with the same pencil to add more depth of colour or apply more pressure.
Lift the parchment away from the pattern to make sure the edge of your petals are crisp.
Step 9:
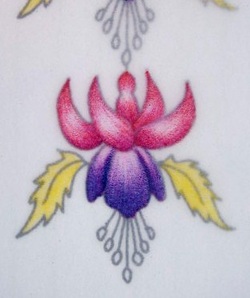
Adding colour to the leaves Yellow 107 apply a layer colour all over.
Adding colour to the leaves Yellow 107 apply a layer colour all over.
Step 10:
Yellow 109 applied from the outer edges of the leaf and flicking inward towards the leaf vein.
Yellow 109 applied from the outer edges of the leaf and flicking inward towards the leaf vein.
Step 11:
Apply Green 166 from the outer edges of the leaf as in step 10.
Keep lifting the parchment away from the pattern so you can make sure the outer edges of the leaves are becoming defined.
Apply Green 166 from the outer edges of the leaf as in step 10.
Keep lifting the parchment away from the pattern so you can make sure the outer edges of the leaves are becoming defined.
Step 12:
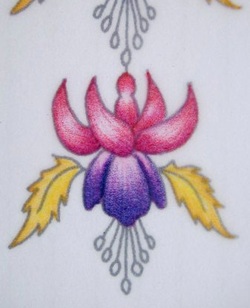
Apply Green 167 from the central leaf vein downwards on one half of the leaf only.
This leaves the top half of the leaf highlighted and the leaf will look dimensional.
Apply Green 167 from the central leaf vein downwards on one half of the leaf only.
This leaves the top half of the leaf highlighted and the leaf will look dimensional.
Step 13:
Define the stamen stems using a very sharp Red 121.
Define the stamen stems using a very sharp Red 121.
Step 14:
Trace around the circles on the end of the stamen stems with a Dark Pink 134
Trace around the circles on the end of the stamen stems with a Dark Pink 134
Step 15:
Add colour inside the circles with Pink 119
This completes your fuchsia.
This technique does require lots of practice, experiment with layering different colours.
You can add one more layer of colour to this flower and that is using a White 101 by applying the white you can blend together and smooth out the pencil lines and accentuate the highlight, have a go at this and see the difference it makes.
TIP: When blending with the white pencil you will pick up colour on its tip so be careful if you are working from dark to light colours, to take off the colour simply colour onto another piece of paper until the tip is white again.
Take a look below at the finished projects made by the ladies from my class (by the way they all paid £6.50 for this class in 2012)
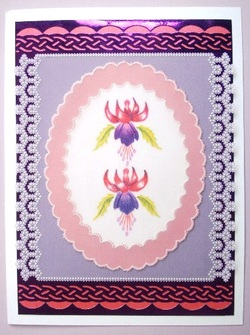
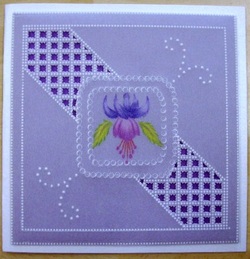
This lady as combined 2 of the fuchsia's inside embossed ovals from the Siesta Daisy Grid and added colour in the outer oval using the same blendable pencils and blending with a blending medium such as Zest it or White Spirit.
The background parchment piece as been edged with my 'Zen Lace Horse Shoe' design.
The background parchment piece as been edged with my 'Zen Lace Horse Shoe' design.
Finished with a simple embossed dot border and a scalloped edge using a small half circle tool.
Attached by sewing seed beads at each corner.
Attached by sewing seed beads at each corner.
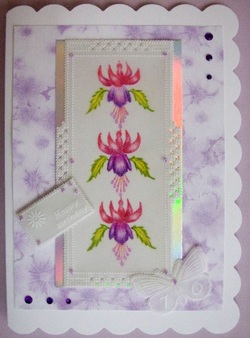
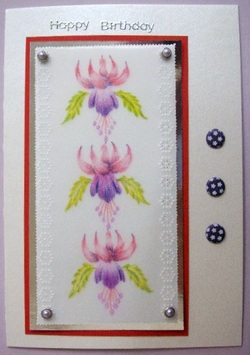
Another pretty card design adding Zen Lace Four by Four to the border and a small greeting tag using sections from the Siesta Birthday Grid and a parchment butterfly embellishment with '70' embossed in the bottom wings.
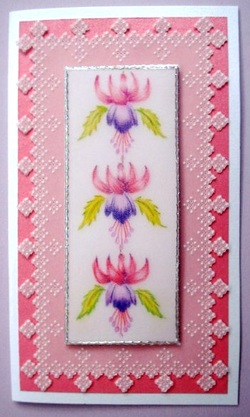
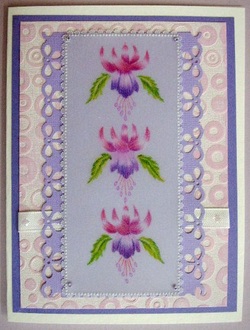
A beautiful parchment border surrounds the 3D topper
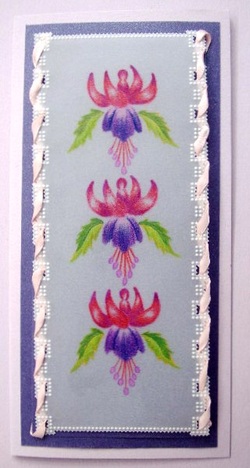
A parchment lace border with entwined ribbon makes a very pretty finish to this card.
A simple embossed design using a Siesta Diagonal Grid along the sides and attached with beads at each corner.
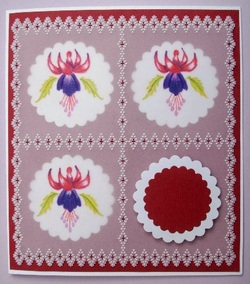
What a completely different effect breaking a design up into 4 sections leaving the fourth section ready for your greeting.
The parchment lace was created using a Siesta Diagonal grid.
The parchment lace was created using a Siesta Diagonal grid.
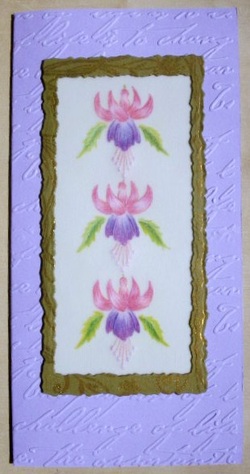
Embossed base card with stamped and die cut gold frame makes it easy to attach your parchment so the adhesive is hidden behind the frame, very clever :-)
A very intricate parchment craft design using just one of the fuchsia images as a central focal point.
The open lace work was created using a Siesta Straight Grid.
I hope these designs have inspired you to have a go all you need to do now is email me for the Triple Fuchsia design Pattern, go to the top of the page and click on the button....
The open lace work was created using a Siesta Straight Grid.
I hope these designs have inspired you to have a go all you need to do now is email me for the Triple Fuchsia design Pattern, go to the top of the page and click on the button....
